How to make a cupcake bouquet: beautiful homemade food gift idea


These aren't flowers – every bloom in this beautiful bouquet is a cute, tempting cupcake. Our simple step-by-step guide will show you how to make it, whether for an anniversary, as a birthday treat, or just because.
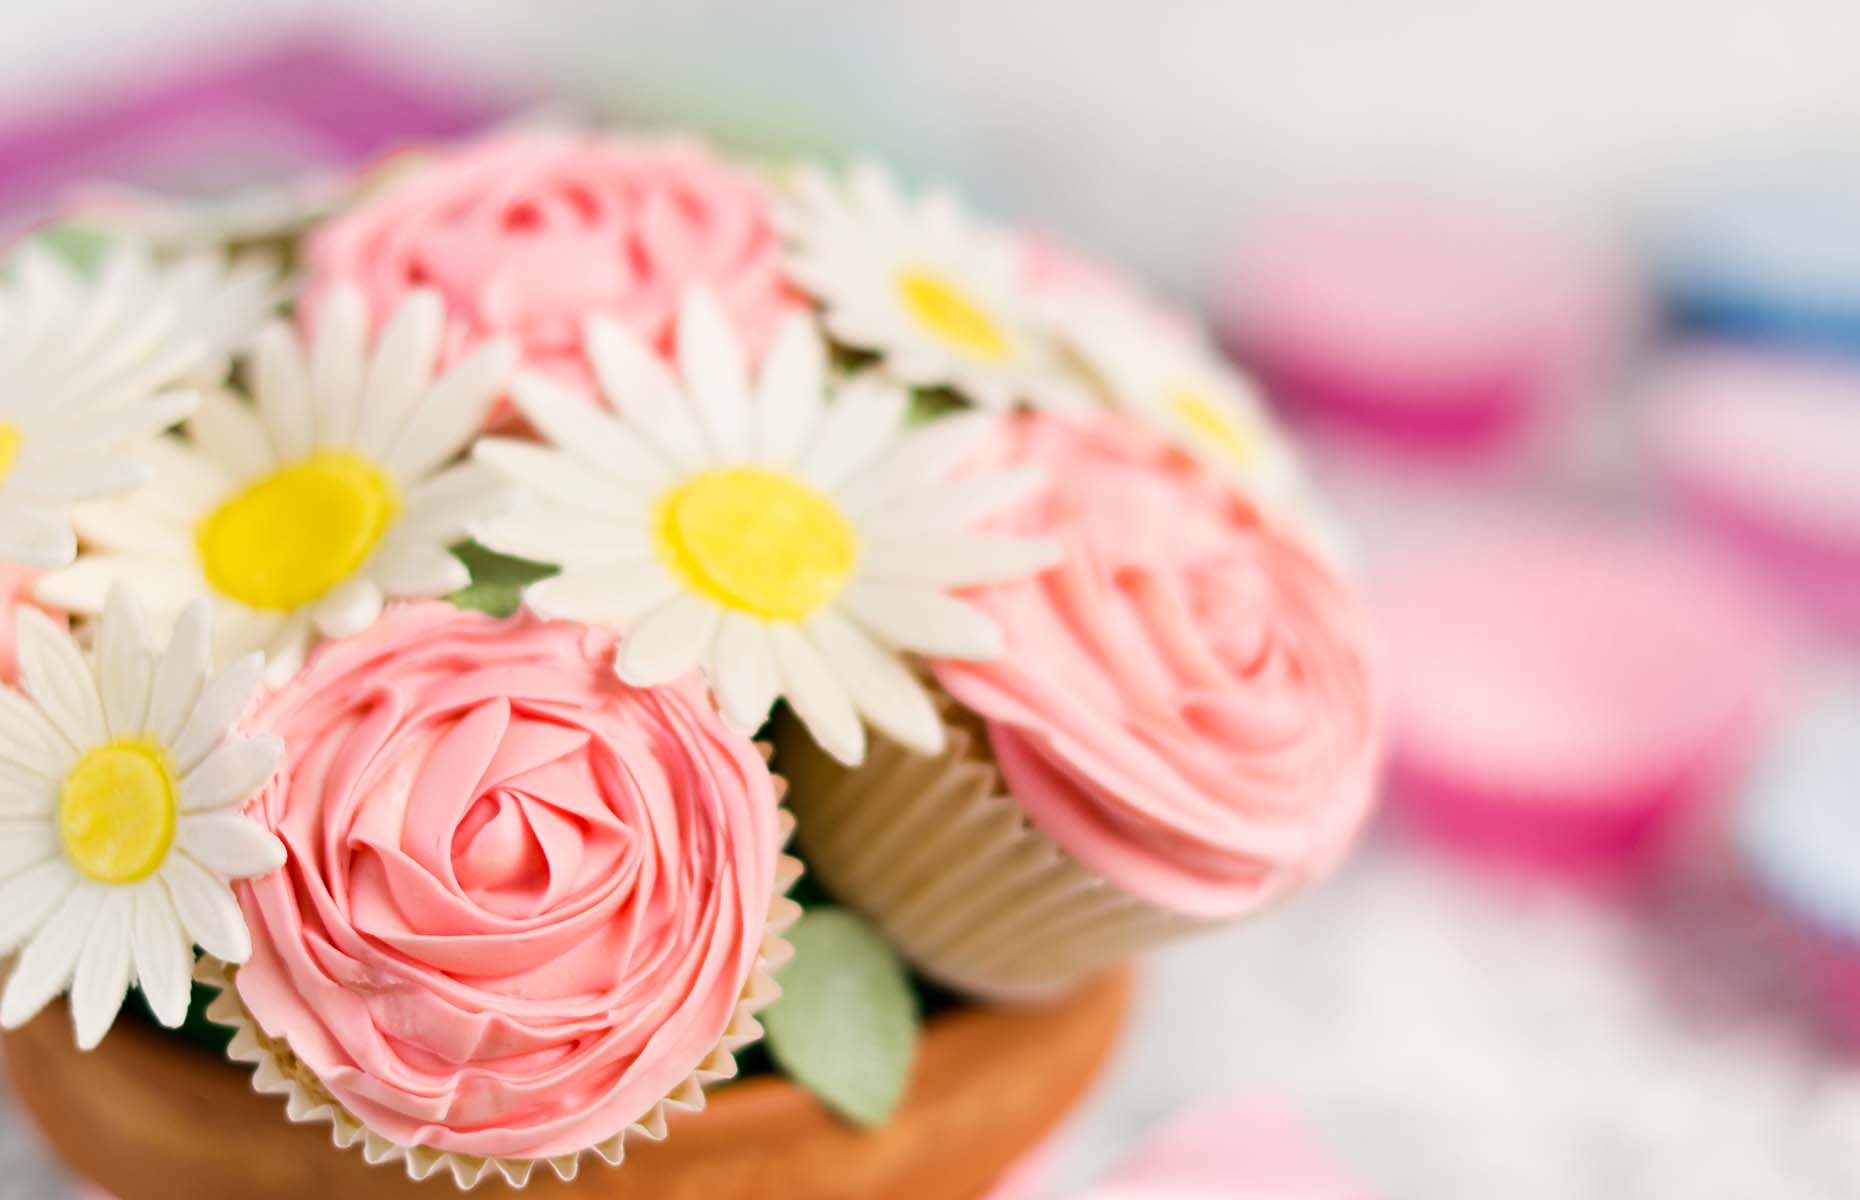
The best gifts have an element of surprise – and this cupcake bouquet delivers that in the most beautiful way. At first glance, it looks like a particularly pretty bunch of flowers. Blink a few times and you'll see each bloom is actually a cupcake, carefully arranged into a the most tempting bouquet you've ever seen.
With a dozen or more cute cupcakes packed in, it's the gift that just keeps on giving, too.
Thankfully, it's actually pretty easy to make and assemble (though the recipient doesn't need to know that).
Follow our step-by-step guide to make your own cupcake bouquet, and show someone just how much you care.
What you’ll need
- At least 12 cupcakes, depending on the size of your bouquet
- A flat cake base, or a plant pot or vase fitted with a foam ball
- Toothpicks or bamboo skewers
- Buttercream icing
- Food colouring
- Piping bags with tips
- Green tissue paper
- Ribbon
Our step-by-step guide to building a cupcake bouquet
The prep
First, you'll need to make (or buy) your cupcakes. If the former, make sure you allow them to fully cool down before you start piping your icing, otherwise your fabulous flowers will just melt away. For a small bouquet, we recommend you use around a dozen. It's always better to have spare cupcakes you can add wherever you see any gaps.
These are our best ever cupcake recipes (and icing ideas) to get you started
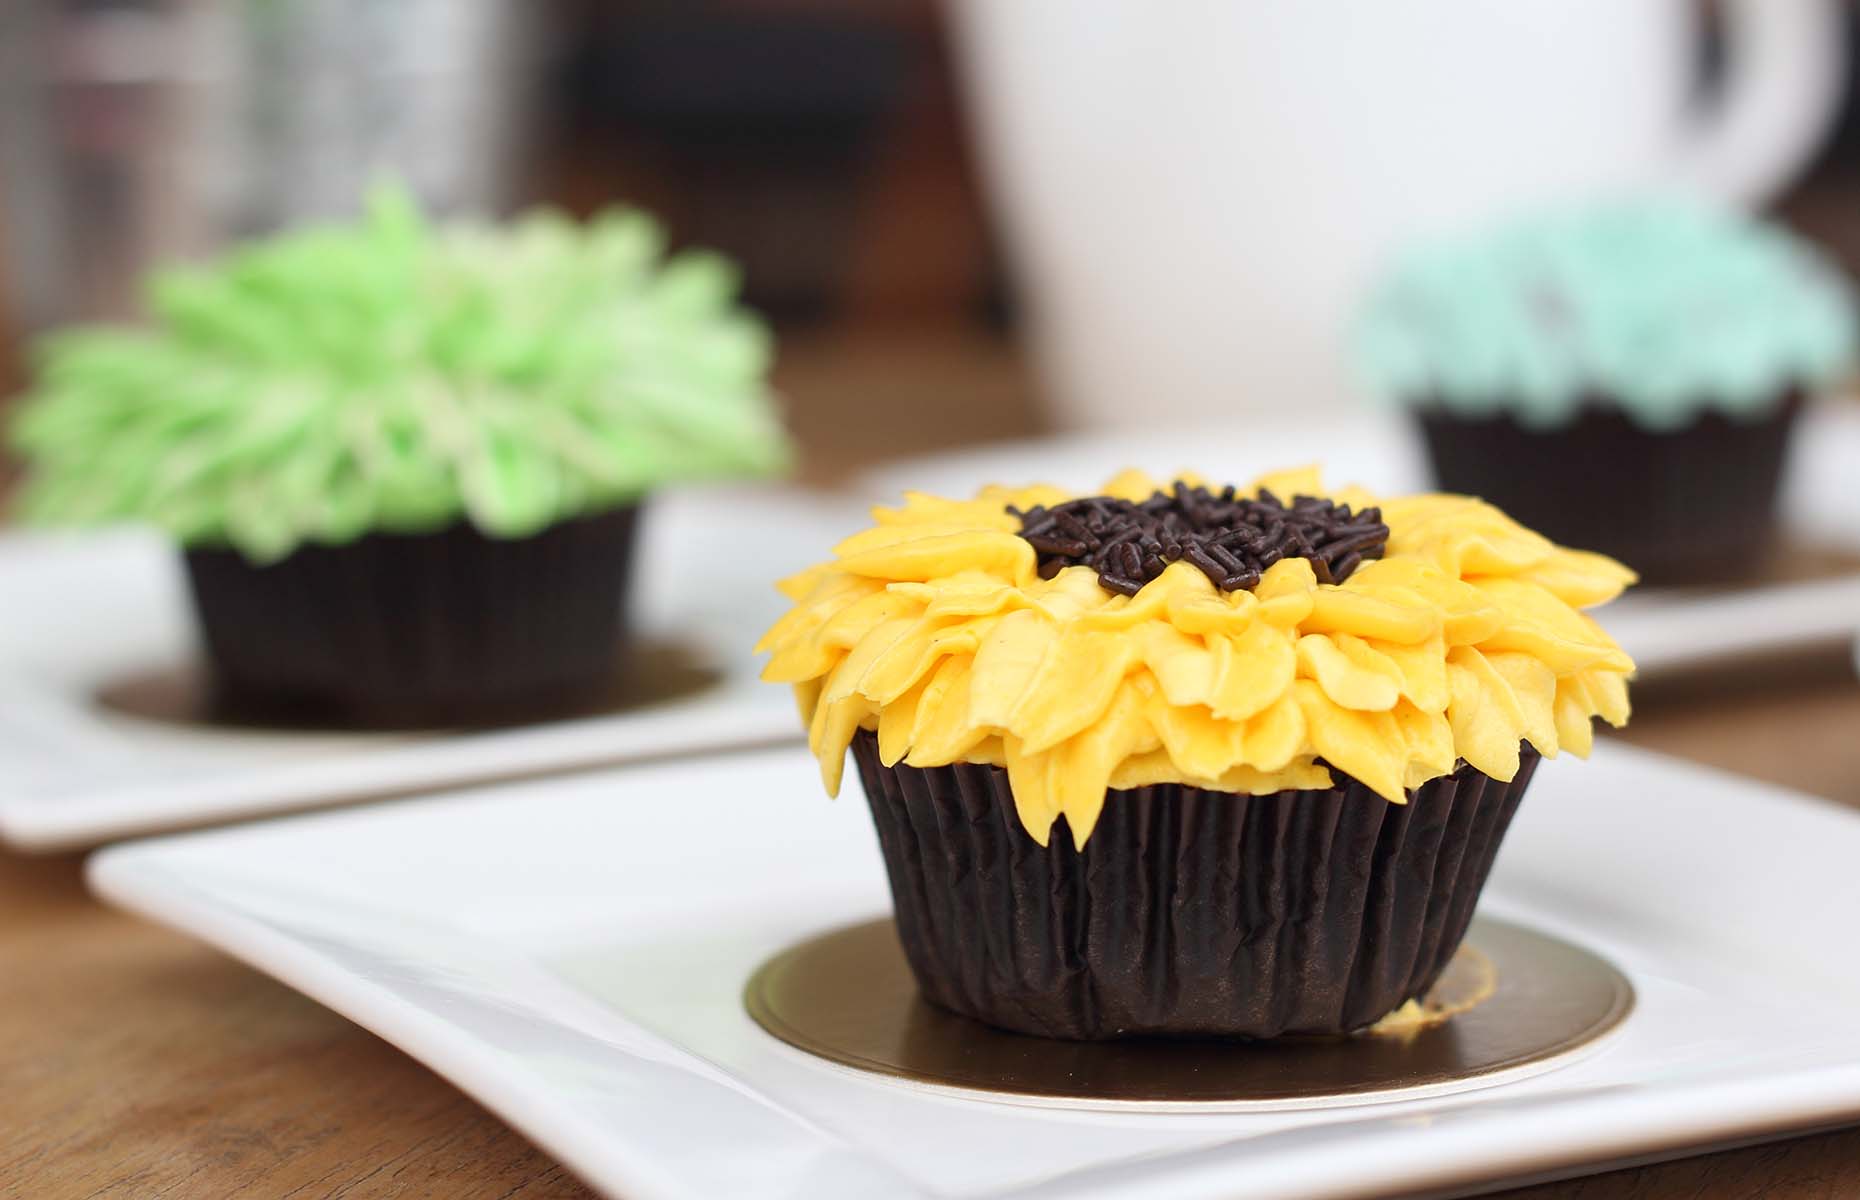
Sunflower cupcake (Image: Kwanbenz/Shutterstock)
A good icing is the key to success when it comes to cupcake bouquets. You will need an icing that is easy to pipe with and holds its shape. We recommend using a sturdy buttercream, which can be easily flavoured and coloured. Bear in mind the temperature of your kitchen – you don’t want your flowers to melt and wilt away.
There are two different approaches you can take when it comes to a cupcake bouquet. The first one, which is an easier, beginner-friendly approach, is to display them on a flat surface such as a cake board. Look in baking and specialist cake shops for one that will fit neatly in a presentation or gift box.
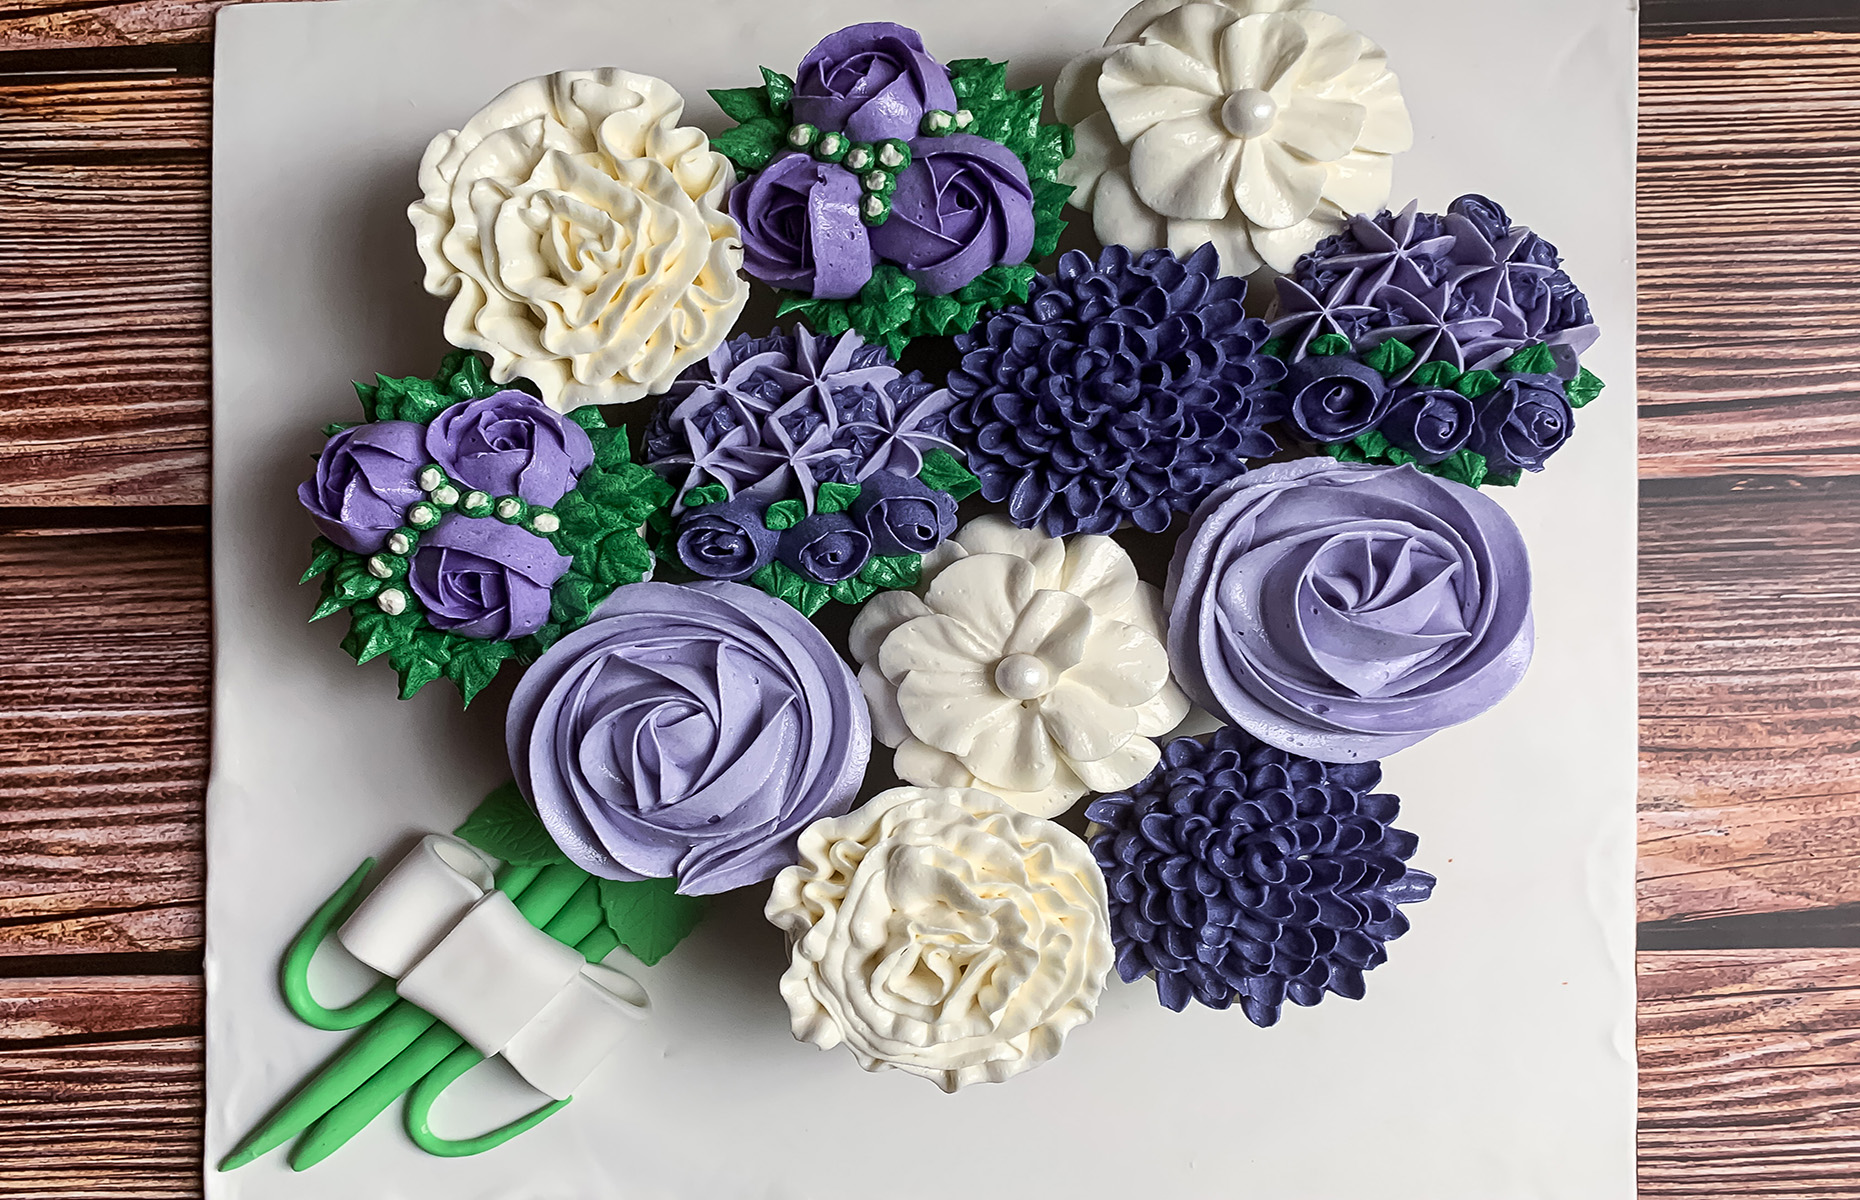
Flat cupcake bouquet (Image: Jed RT/Shutterstock
For a more expertly crafted design that resembles a real bouquet, you'll need a solid base such as a ceramic vase or tin plantpot. You'll also need a Styrofoam ball, which can be found in craft supply shops, or some floral foam (find it at florists' shops and garden centres). The ball should fit snugly on your base – look for one that is the same diameter as the opening of the base. You can also adhere it to your base with a little hot glue (just be careful and use sparingly, making sure it's fully dried before starting your 'flower' arranging).
Building your bouquet
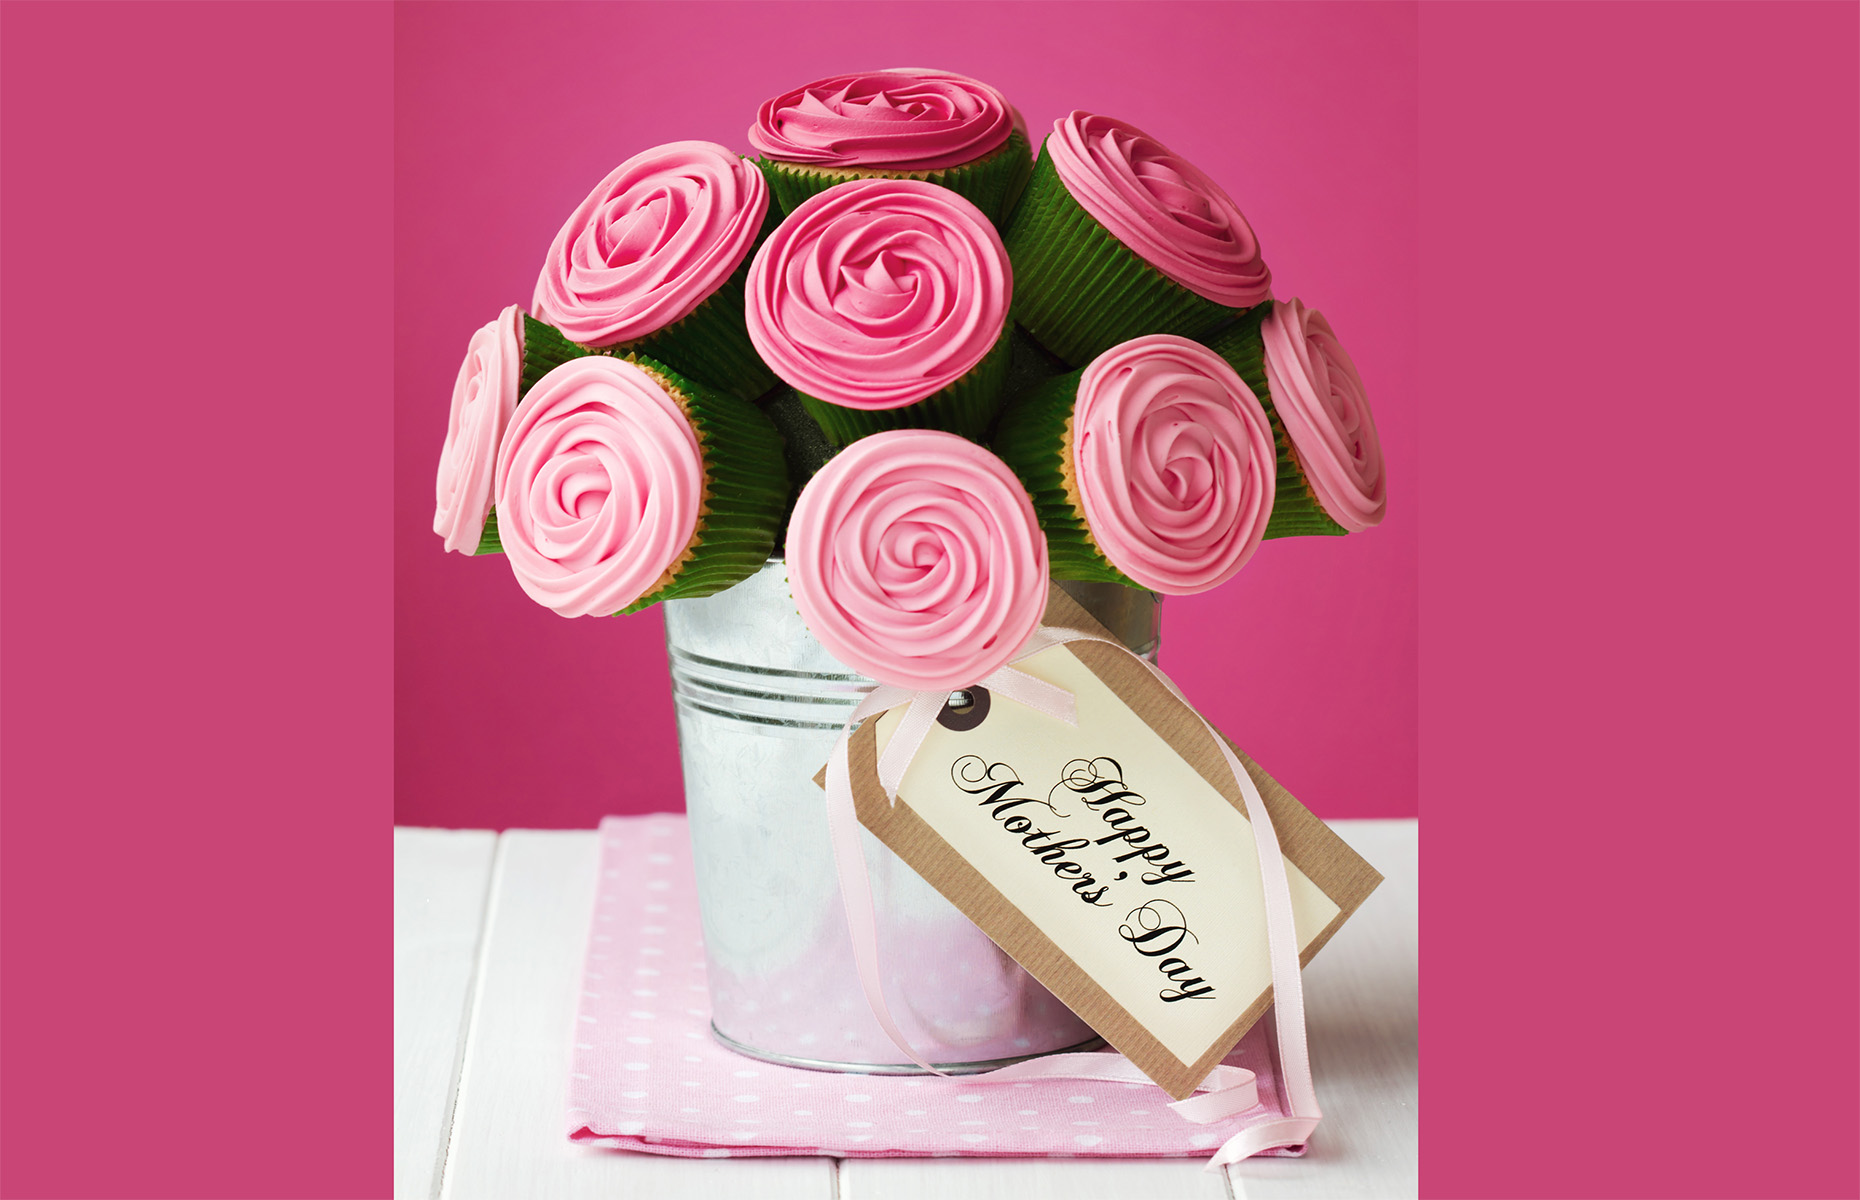
Mother's Day cupcake bouquet (Image: Ruth Black/Shutterstock)
Step one: build your foundations
You don't really need to do anything if you're using a board but, if you're going for the vase or plant pot version, place toothpicks or bamboo skewers (depending on how 'tall' you want your bouquet to be) into the foam, roughly where the cupcakes will go (you can twiddle them around when it comes to assembling). Use around three per cupcake and arrange evenly over the ball, bearing in mind the size of your cakes.
Step two: pick your palette
Unless you'd prefer plain white or off-white blooms, you'll need food colouring to give your bouquet some pizzazz. A rainbow of colours is lovely, or stick to a couple of shades for a sophisticated colour palette. Put your icing in separate bowls (depending on how many colours you're going for) and add the appropriate amount of food colouring to each. Then, either knead in well or, for a more natural looking flower, keep it streaky and swirly.
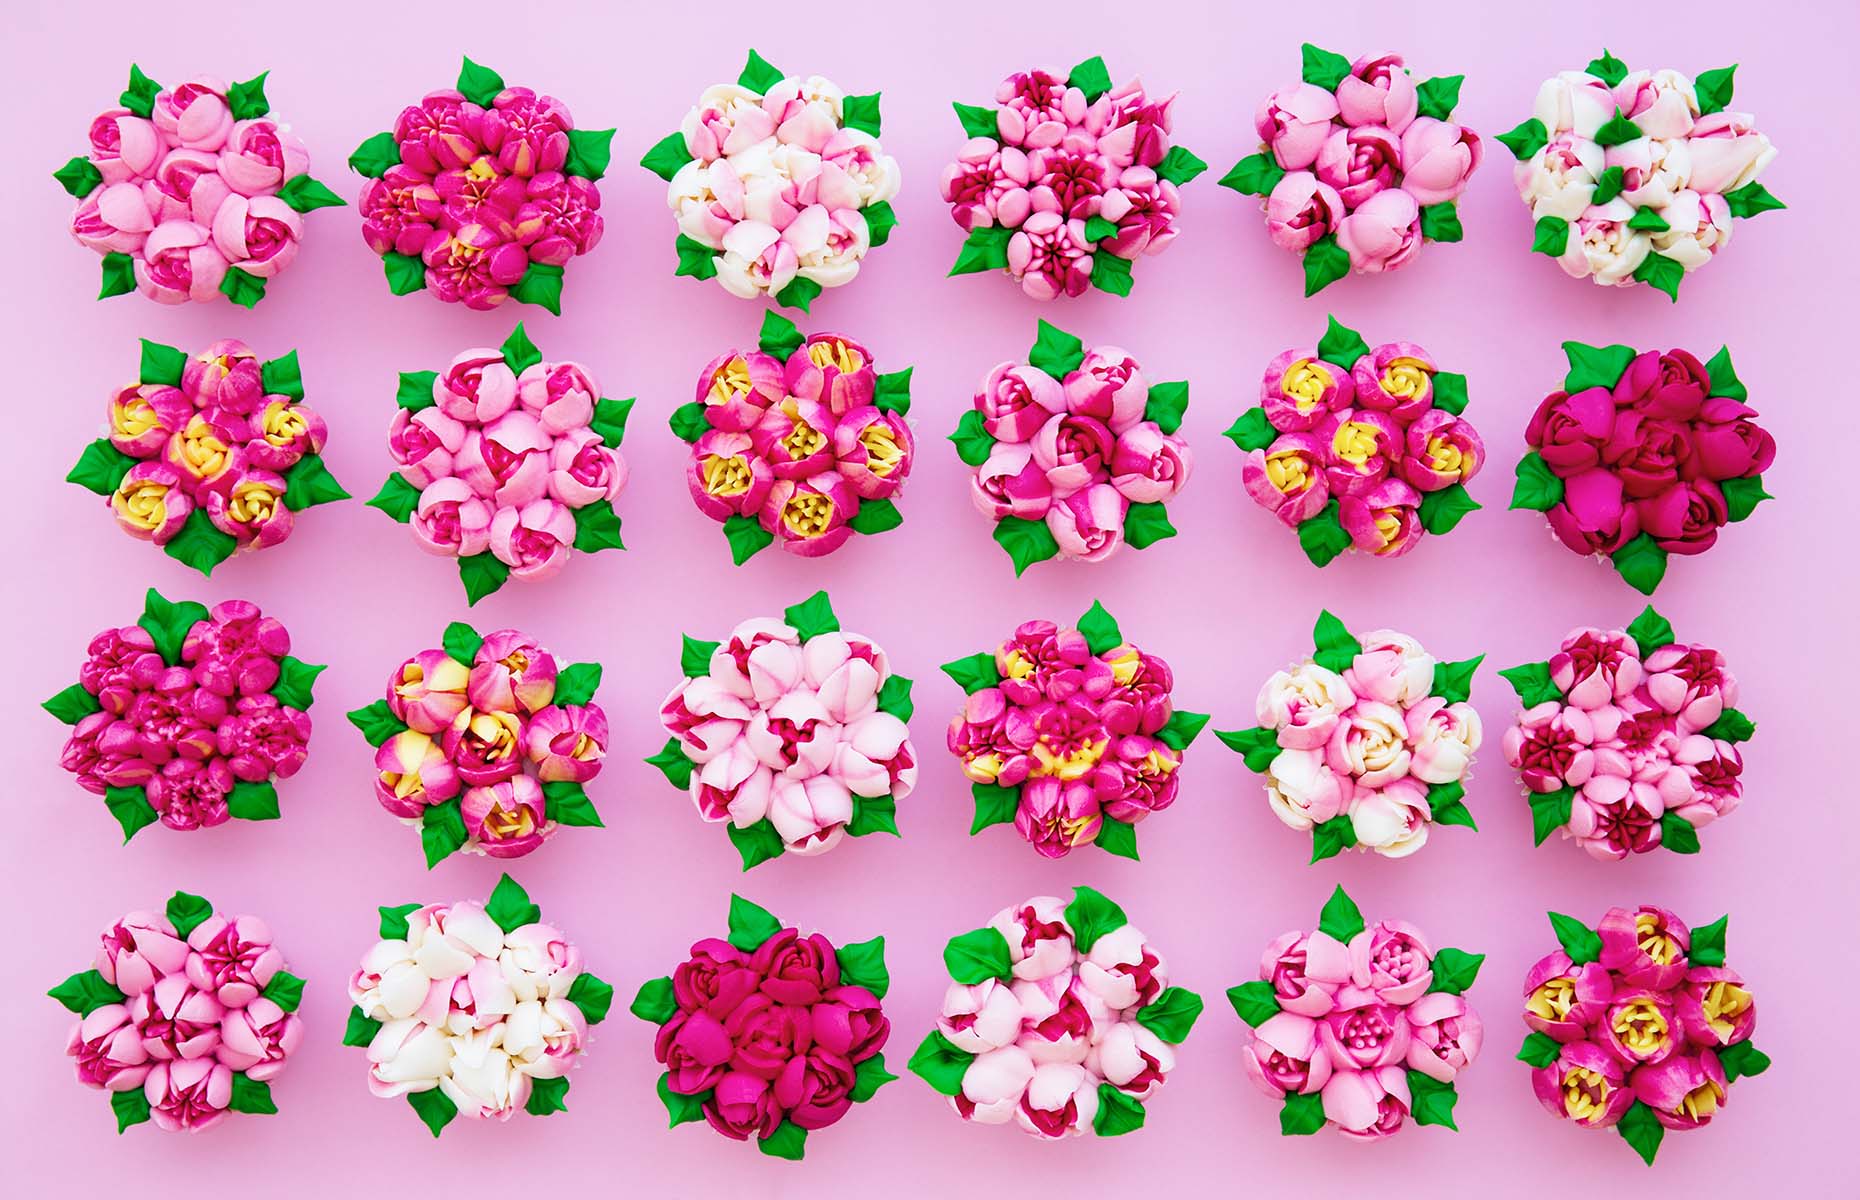
Piped flower cupcakes (Image: Ruth Black/Shutterstock)
Step three: get piping
There are two approaches you can use when piping. If you are going for a simple, delicate piped flower, stick your cupcakes to the base first before piping. For more complex piping it may be easier to decorate the cupcakes first and then pop them in place. For the latter, a good tip is to refrigerate your cupcakes once piped to firm up the icing before you attempt to position them and risk smudging your good work.
The simplest approach is to do swirls, starting in the centre and circling to the edge. For a rose shape, use a broad, flat piping tip and, holding it vertically, pipe in circles from the centre outwards. Or just let your imagination run wild, perhaps using images of favourite flowers as inspiration.
If your piping skills still need some work, you can buy premade icing flowers to enhance your cupcakes, and a selection of tips for your piping bags, which will help you create different flowers. Fine tips are best for intricate details, while wider ones can be used for petals. Star-shaped tips make for pretty, crinkly-edged swirls.
Most importantly, just set your creative side loose and have fun – even a slightly splodgy, messy creation will look lovely arranged in a bouquet, especially with a scattering of sprinkles, a spritz of edible glitter, or both.
 Cupcake bouquet using premade icing flowers (Image: Nathan clifford/Shutterstock)
Top tip: As you pipe, only pull the bag away from the cupcake once you've stopped squeezing, so the ends are cut clean and you avoid that annoying trail of icing that so often ruins a perfectly decorated cupcake.
Step four: arrange your flowers
Once you're happy with your piping, secure each cupcake to the toothpicks or skewers, moving them as needed.
Then, fill in any gaps with green tissue paper or (even better) green buttercream or icing. Add a ribbon to the base or a tag with a personal note. If you're going for the flat alternative, all you need to do is arrange the cupcakes on the board using green icing to pipe the stems. You can also pipe a name or note on the board. Place your creation in a cake box topped with a ribbon – and prepare to make someone's year!
Lead image: A-photographyy/Shutterstock
Comments
Do you want to comment on this article? You need to be signed in for this feature